A uv-table with calibrated source visibilities can be created by
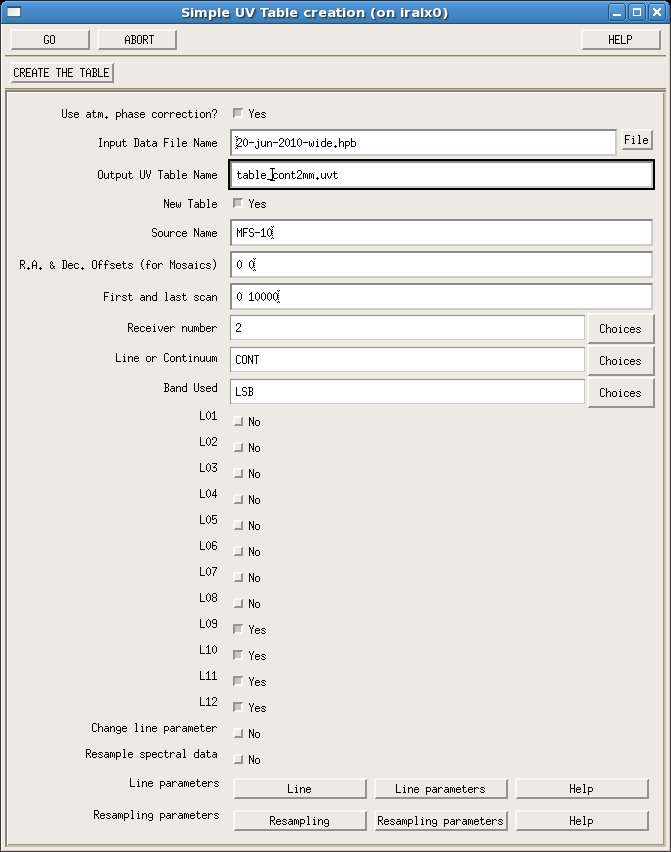
selecting ``Write a UV Table'' in the CLIC menu (Fig. ![[*]](crossref.png) ). A widget similar to the one shown in Fig. is
opened. The hpb file name, table name (with no extension),
source name, receiver band, tuned side band and table mode (with
spectral -LINE- or without spectral -CONT- information)
are to be specified. In the widget, the atmospheric phase correction
must be disabled if it was not taken into account in the
calibration. The rest frequency can be redefined, as well as the table
resampling for the LINE mode. A uv-table is newly created
if the option New Table is set on; visibilities are added
to an existing uv-table if the option New Table is set
off.
). A widget similar to the one shown in Fig. is
opened. The hpb file name, table name (with no extension),
source name, receiver band, tuned side band and table mode (with
spectral -LINE- or without spectral -CONT- information)
are to be specified. In the widget, the atmospheric phase correction
must be disabled if it was not taken into account in the
calibration. The rest frequency can be redefined, as well as the table
resampling for the LINE mode. A uv-table is newly created
if the option New Table is set on; visibilities are added
to an existing uv-table if the option New Table is set
off.
This procedure creates (or includes) the selected calibrated source
visibilities into the specified uv-table, but also creates (or
updates) a clic procedure, which can be executed by entering
``@mytable-table.clic'' in CLIC to produce the same table (of name
``mytable'' in this example). Editing a script to create tables (the
file ``mytable-table.clic'' in our example, see Fig. ) is
easy and likely faster than filling in all the options available in
the widget to create tables. This clic procedure defines the
hpb file, calibration and table settings, selects the
correlations on source, and finally uses the CLIC command ``table'',
possibly with the options ``/resample'' and ``/frequency''. In the
CLIC menu there exist other more complex procedures to create
tables, but likely none of them is as fast and flexible as editing
table scripts is.
Particularly for mosaics a table must be created for each observed
offset, all of them with a generic common name followed by an offset
number (an example is shown in Fig. ). The imaging
MAPPING procedures (presented in Sect. ) will so
recognize the mosaic and properly proceed with the imaging.